Sync Emails and Calendars with CRM
Introduction:
The Pillar platform uses the Microsoft 365 Graph API to sync emails and calendar events with CRM. This step-by-step guide shows how to configure an application so Pillar can sync emails and calendar events for contacts using Microsoft Graph.
Prerequisites:
- A Microsoft 365 account with an active Exchange mailbox.
- A Microsoft 365 account with administrator access to the Azure Portal.
Azure Setup:
To sync emails using the Microsoft Graph API, you need to generate credentials in Azure that will enable us to authenticate, send, and receive emails.
Create an Enterprise Application
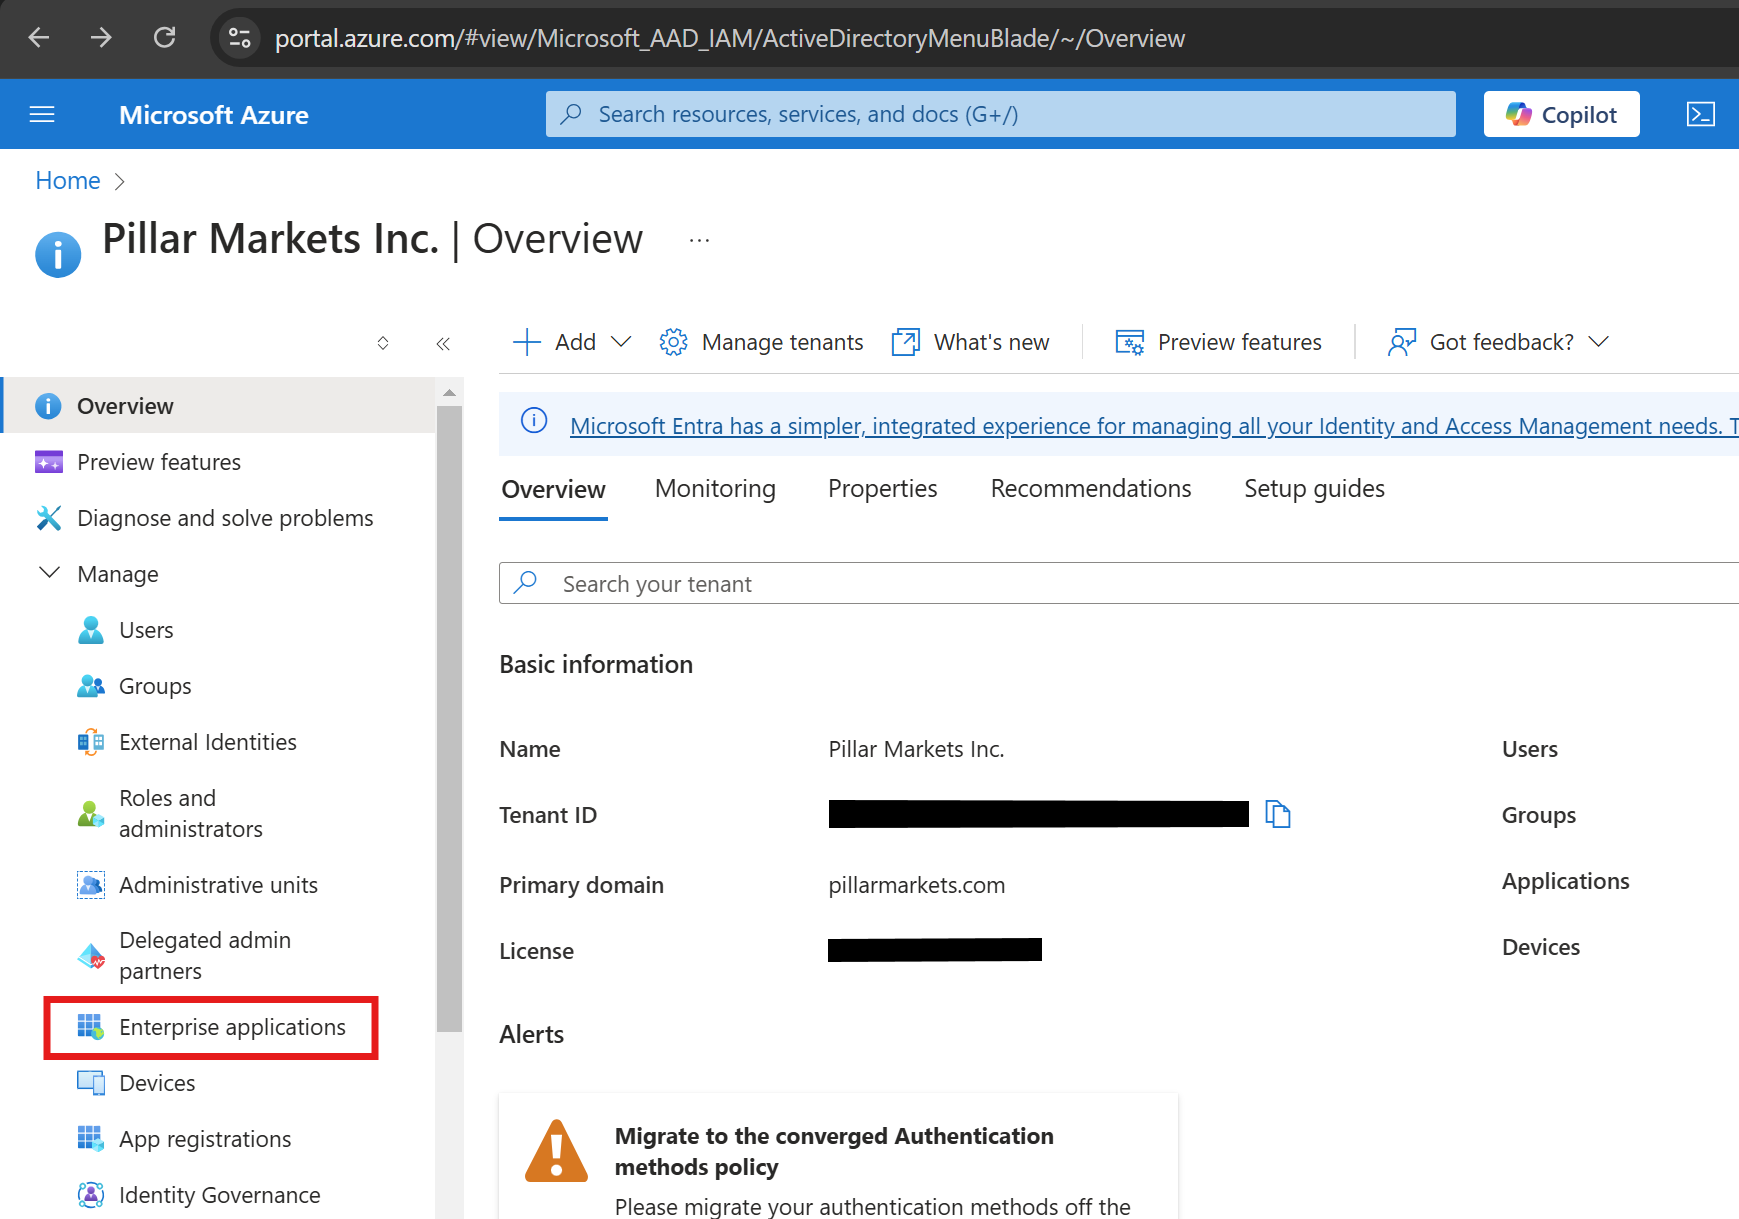
- Log in to the Azure Portal and navigate to Entra ID > Enterprise Applications.
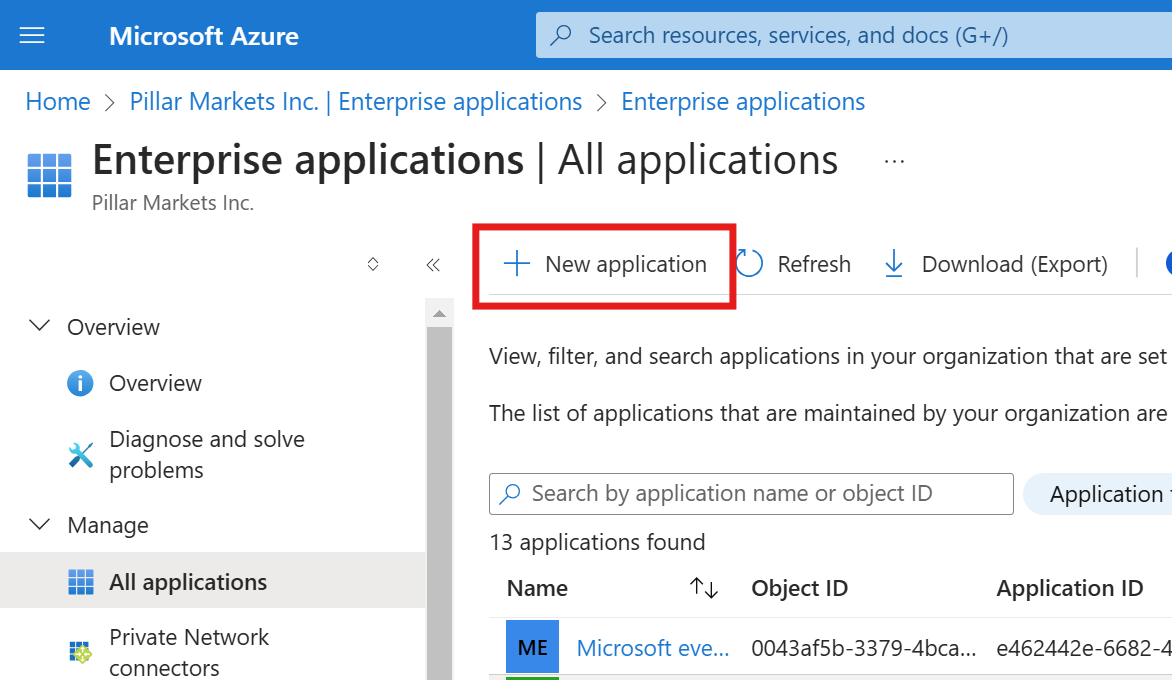
- Select New application.
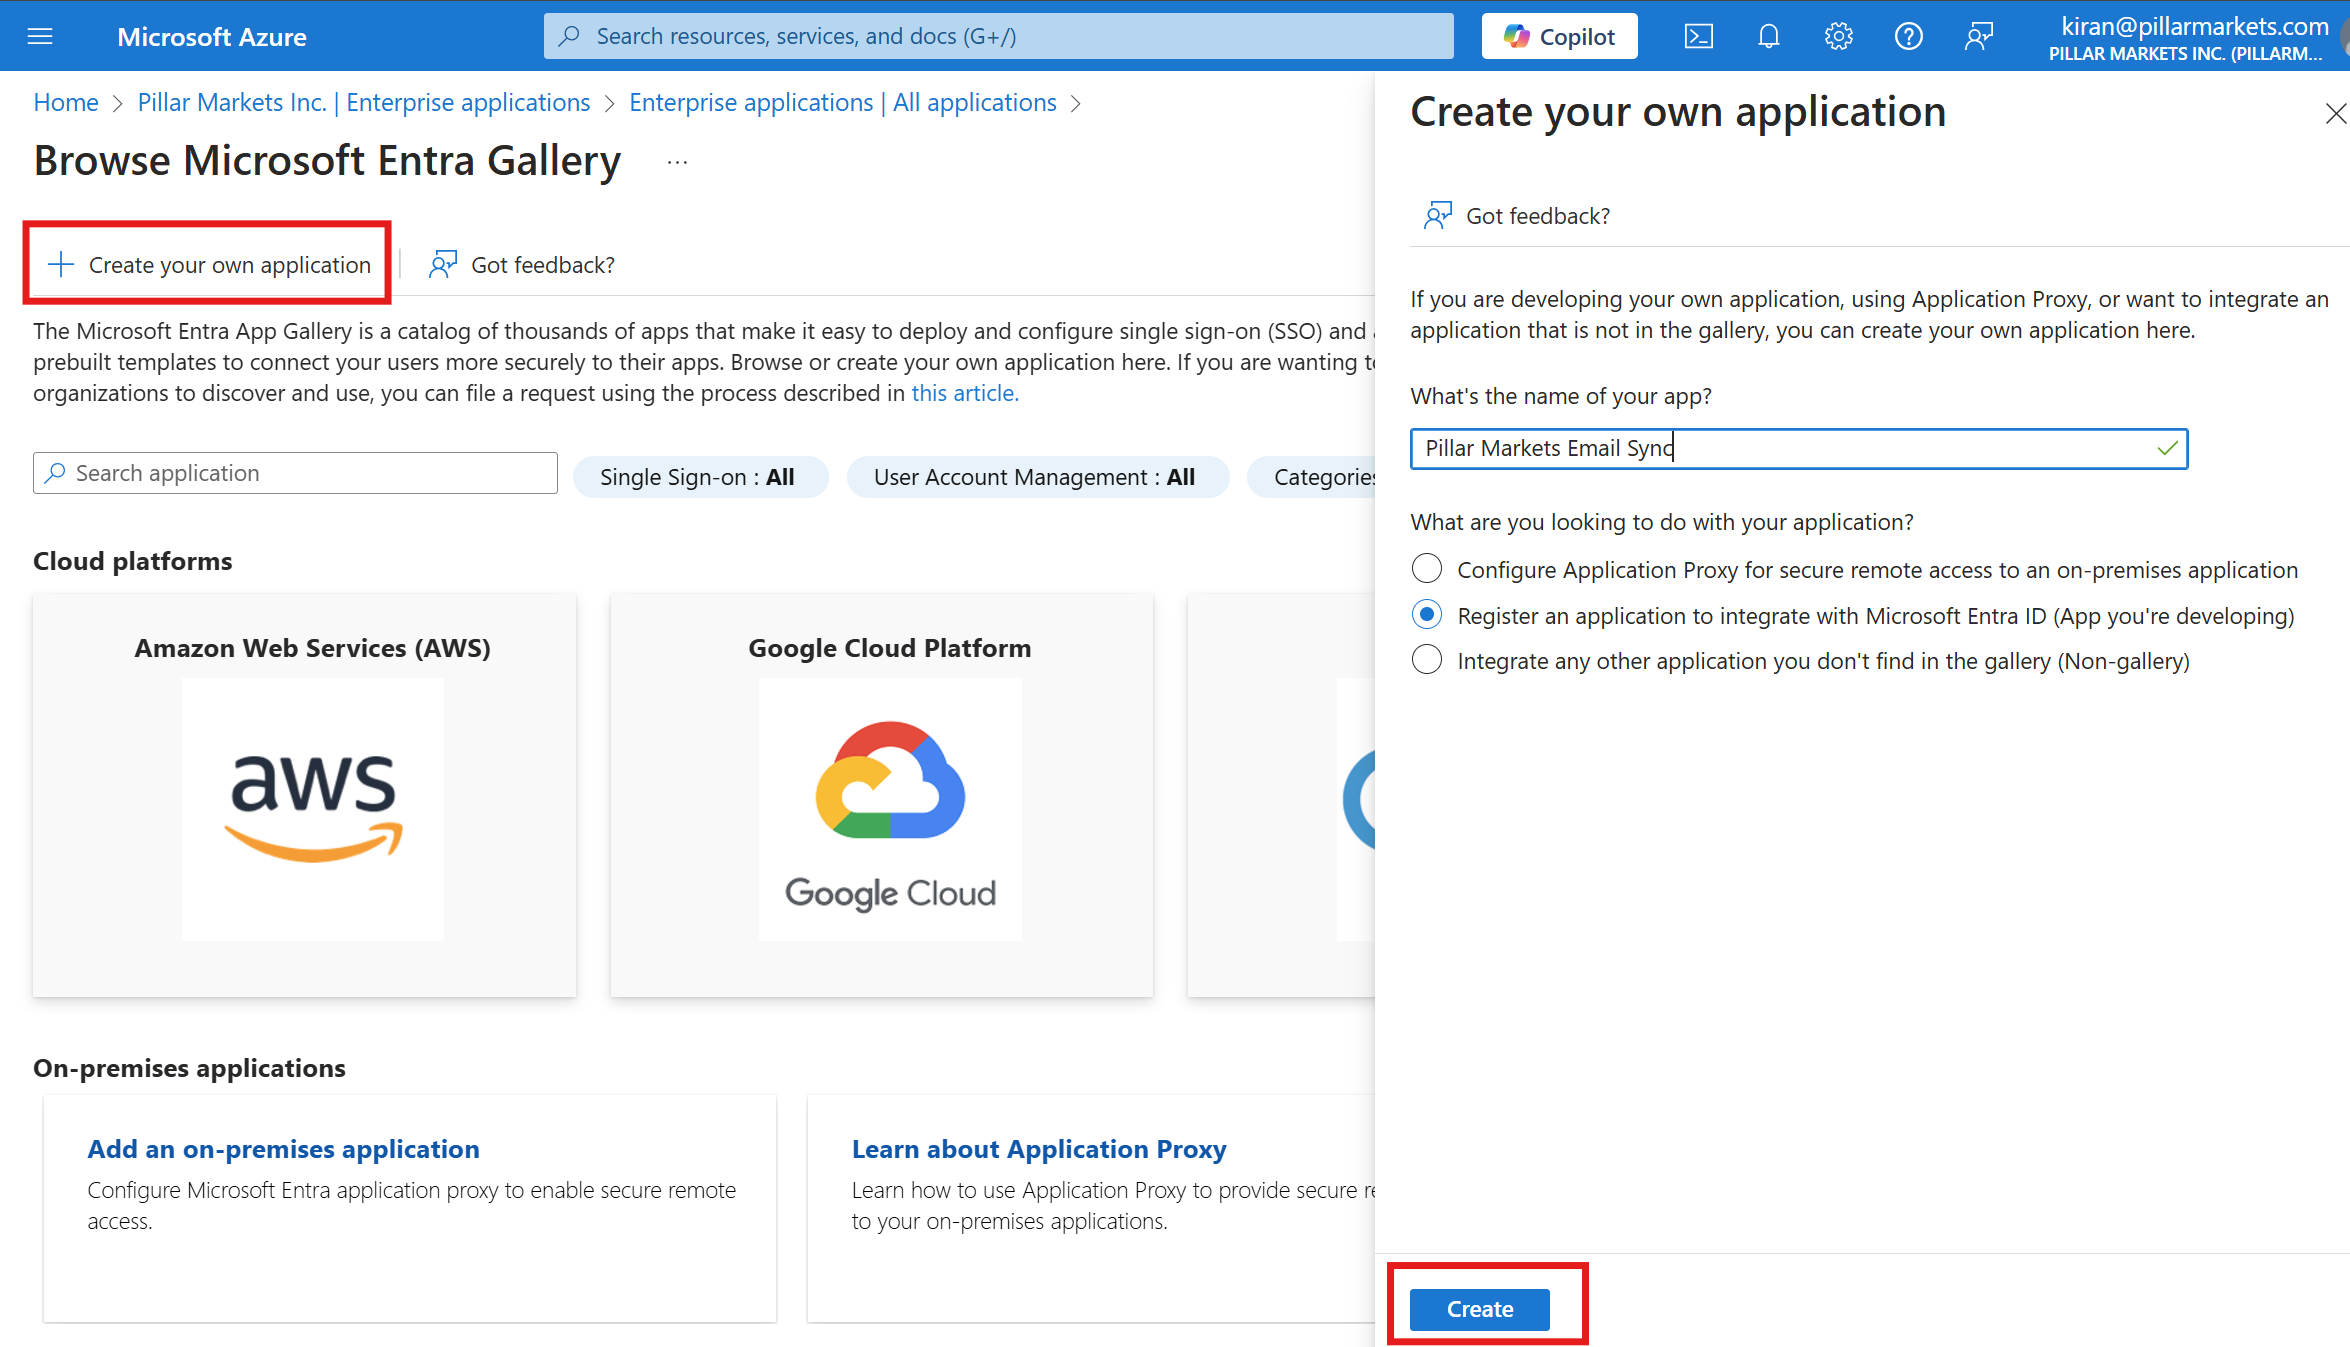
- Choose Create your own application, name it (e.g. Pillar Markets CRM Email Sync), select Register an application to integrate with Microsoft Entra ID, and click Create.
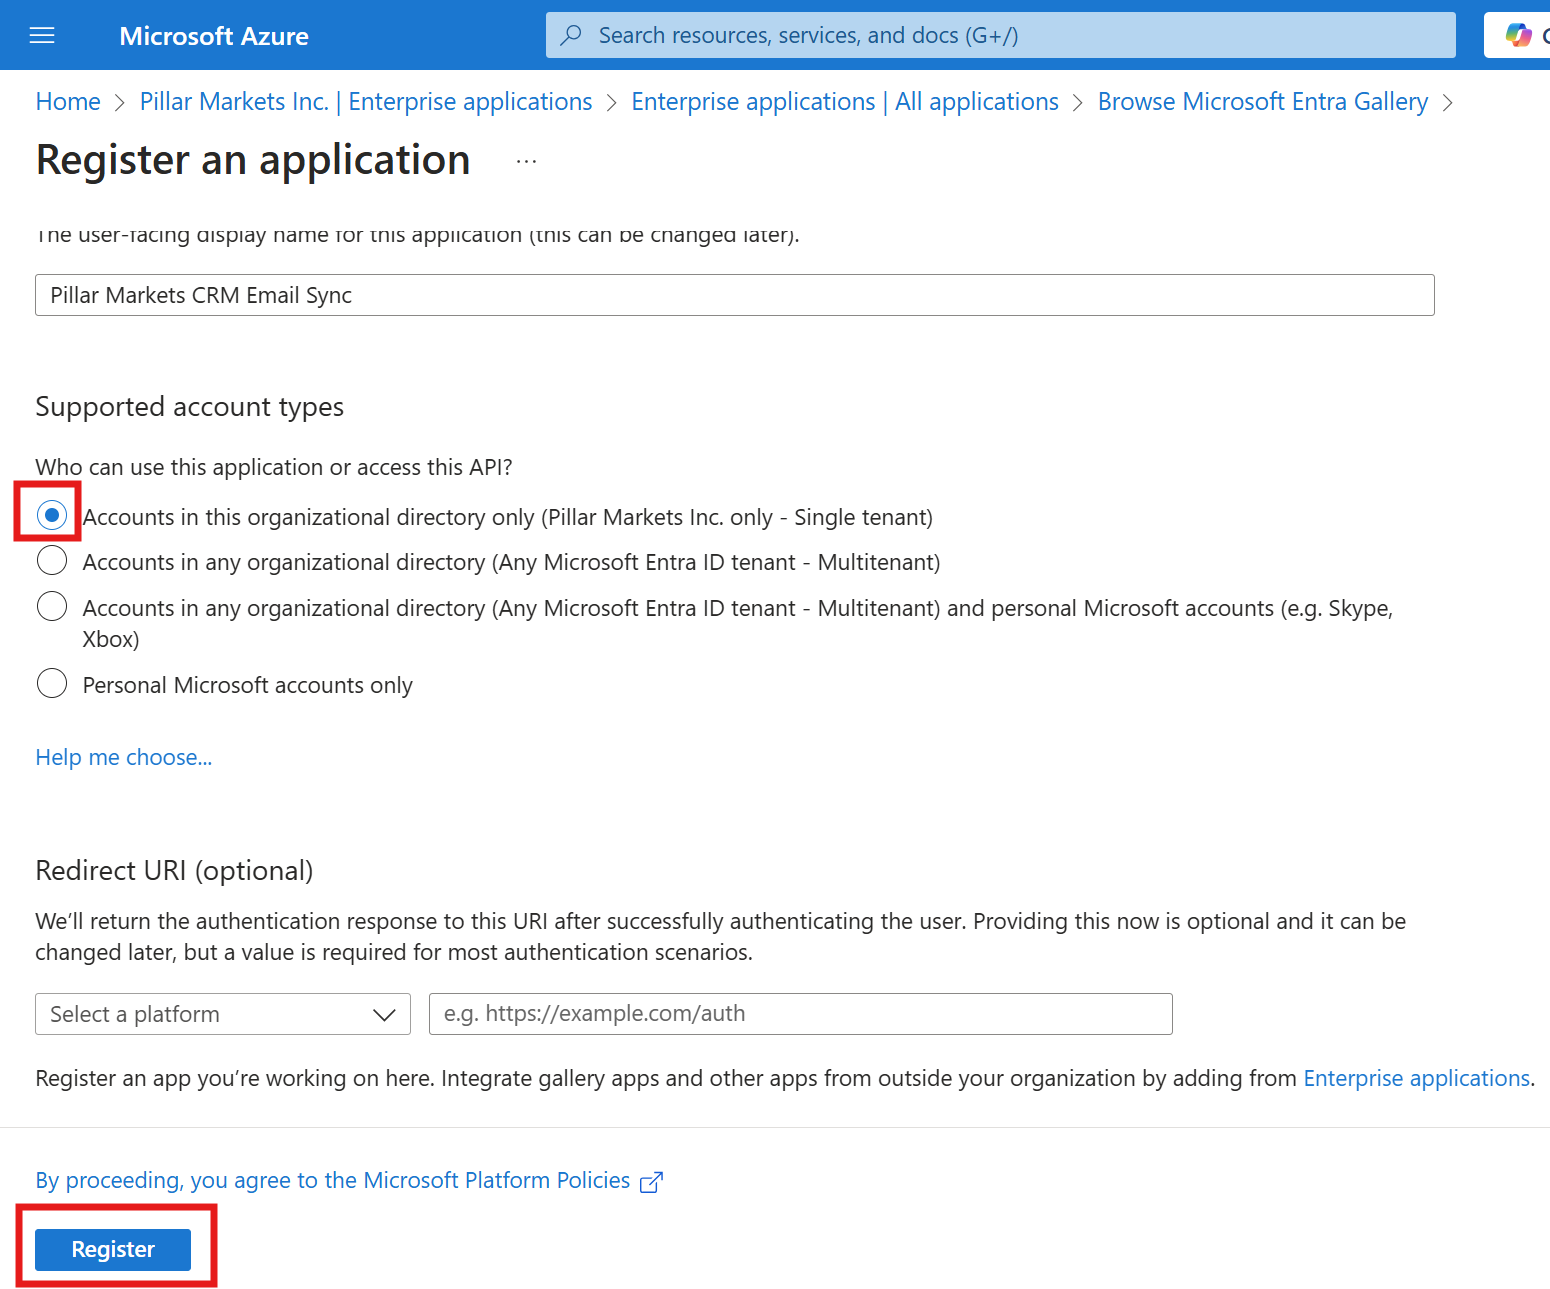
- Select Accounts in this organizational directory only and click Register.
Grant Permissions:
The Enterprise Application needs to be granted permissions to be functional. You'll need to grant the following application permissions so the app can operate without a signed-in user:
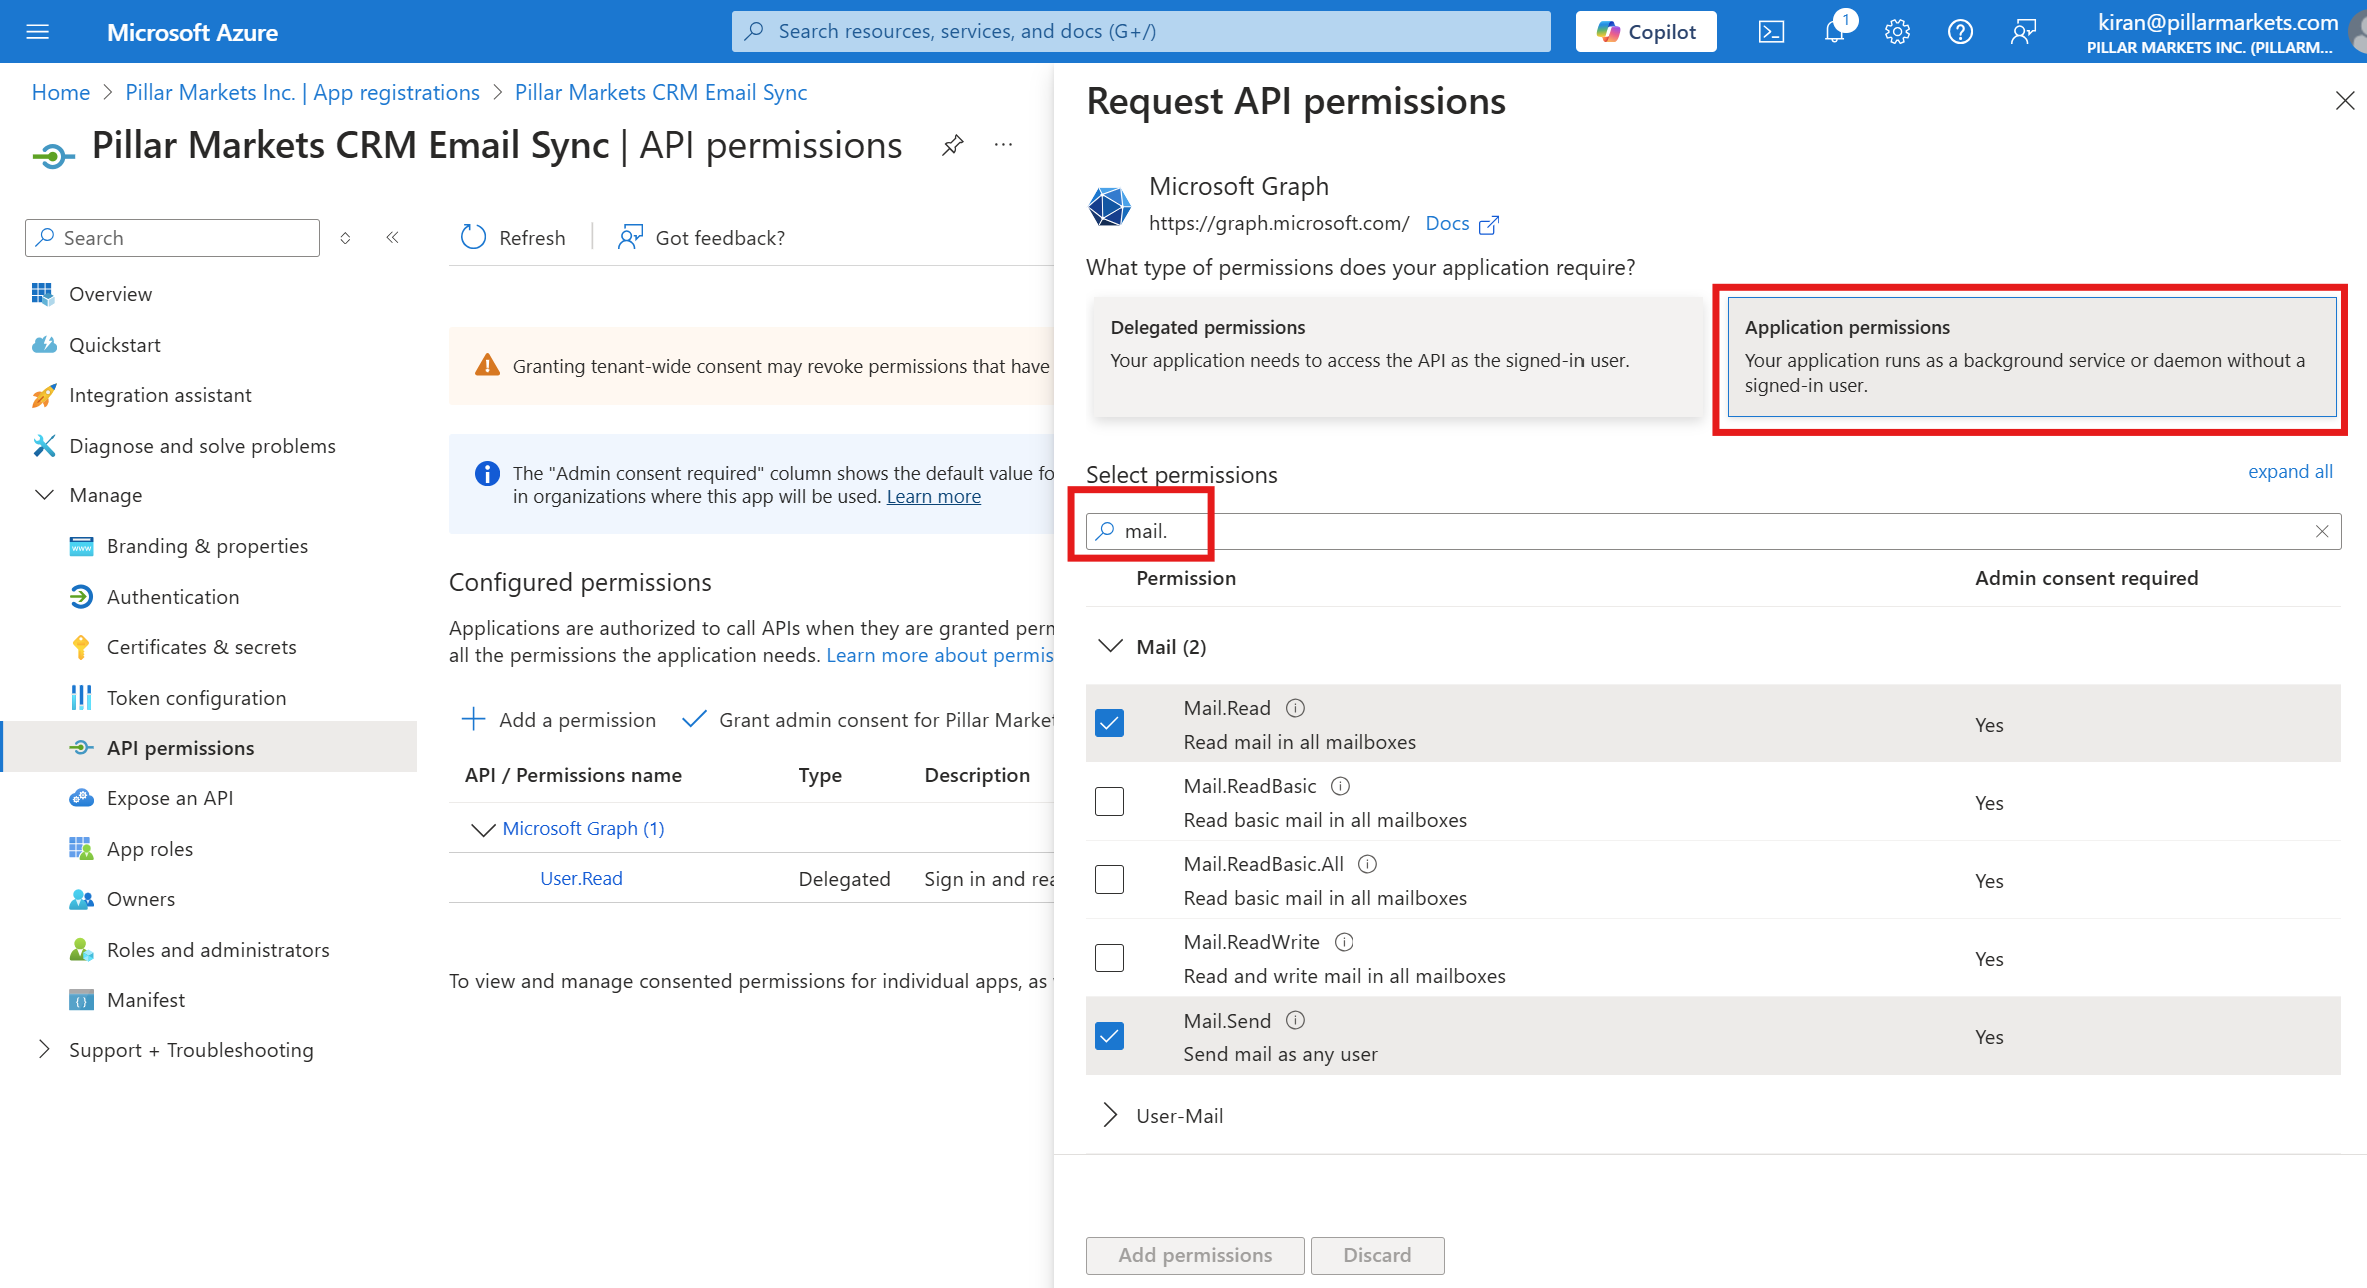
- Mail.ReadWrite (read/write mail in all mailboxes)
- Mail.Send (send mail as any user)
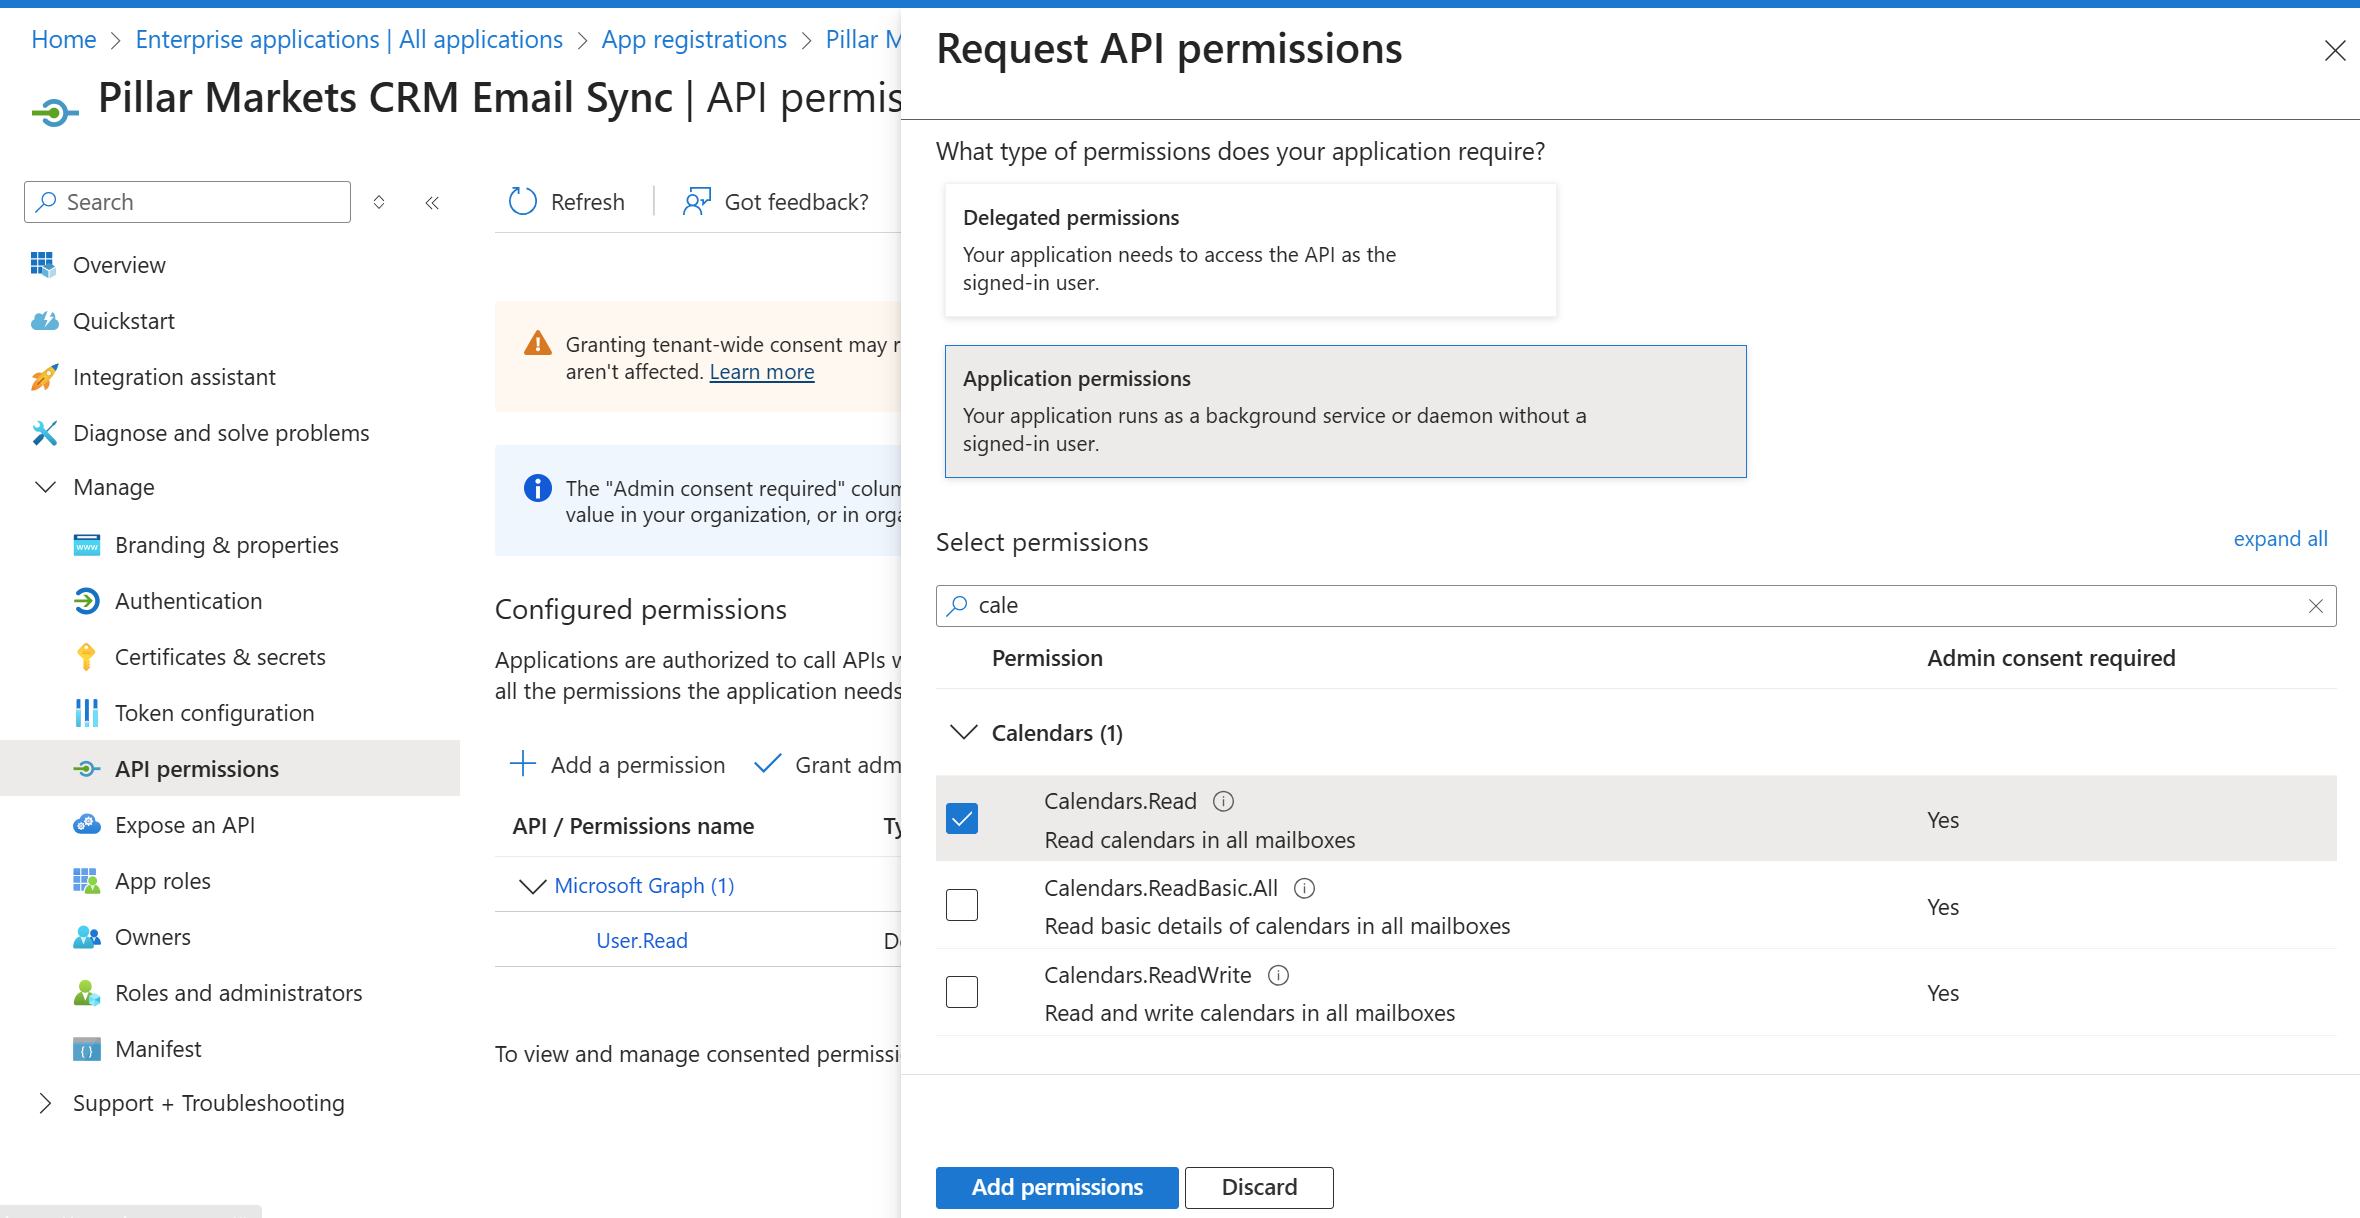
- Calendars.Read (read calendars in all mailboxes)
-
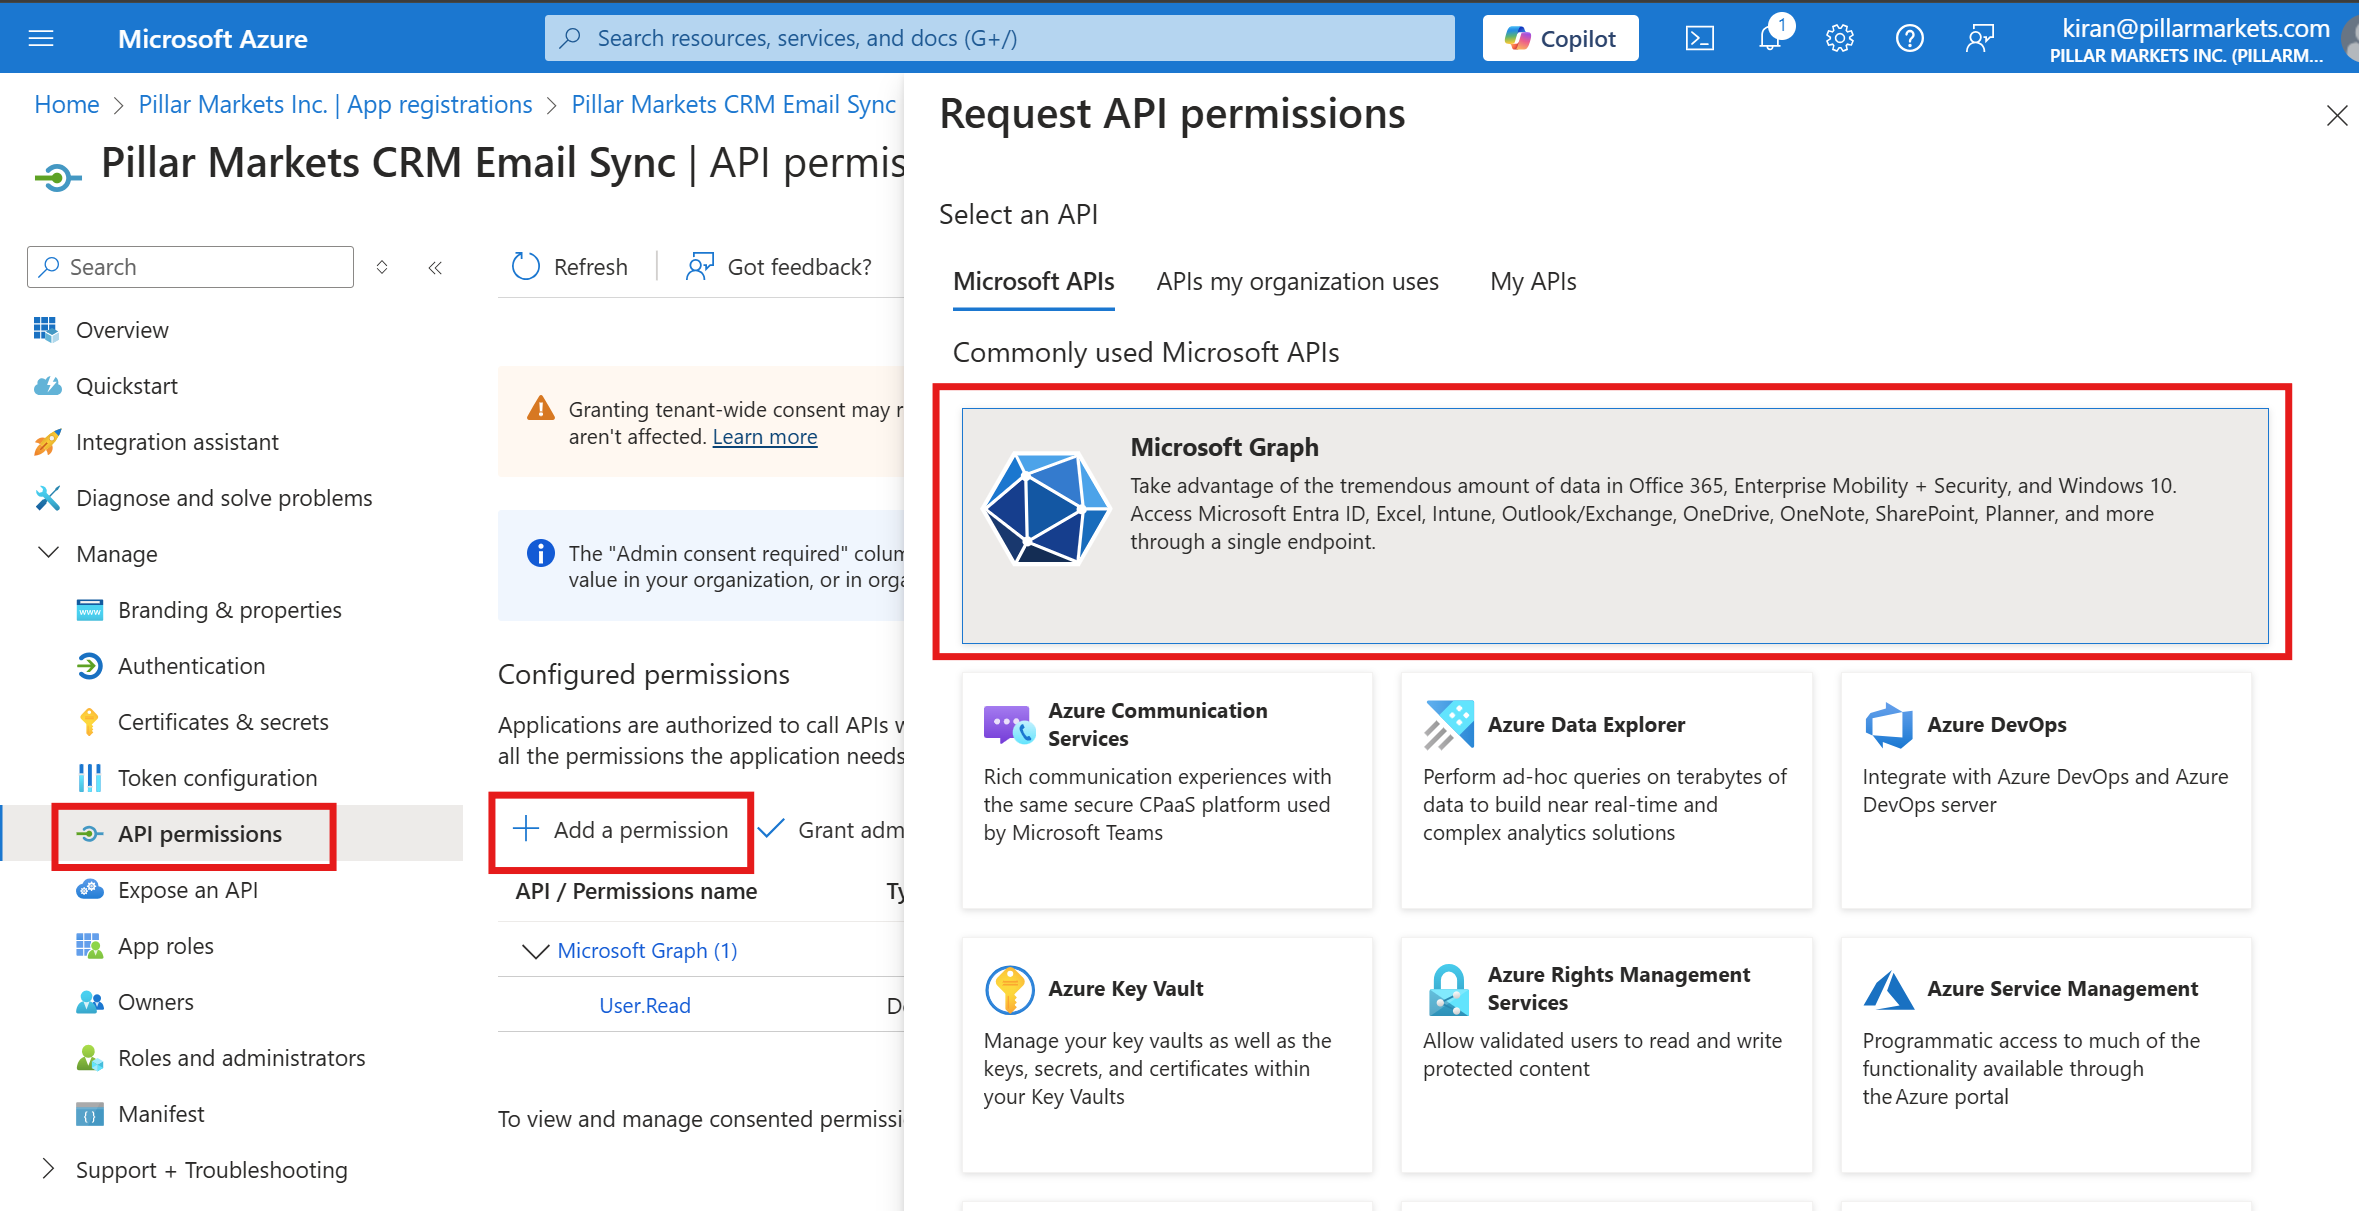
Navigate to Entra ID > App registrations > All applications and open the application you just created.
-
Go to API permissions, click Add a permission, then select Microsoft Graph.
- Choose Application permissions, search for the permissions Mail.ReadWrite, Mail.Send, and Calendars.Read, select them, and click Add permissions.
- Click Grant admin consent to activate the permissions for your tenant.

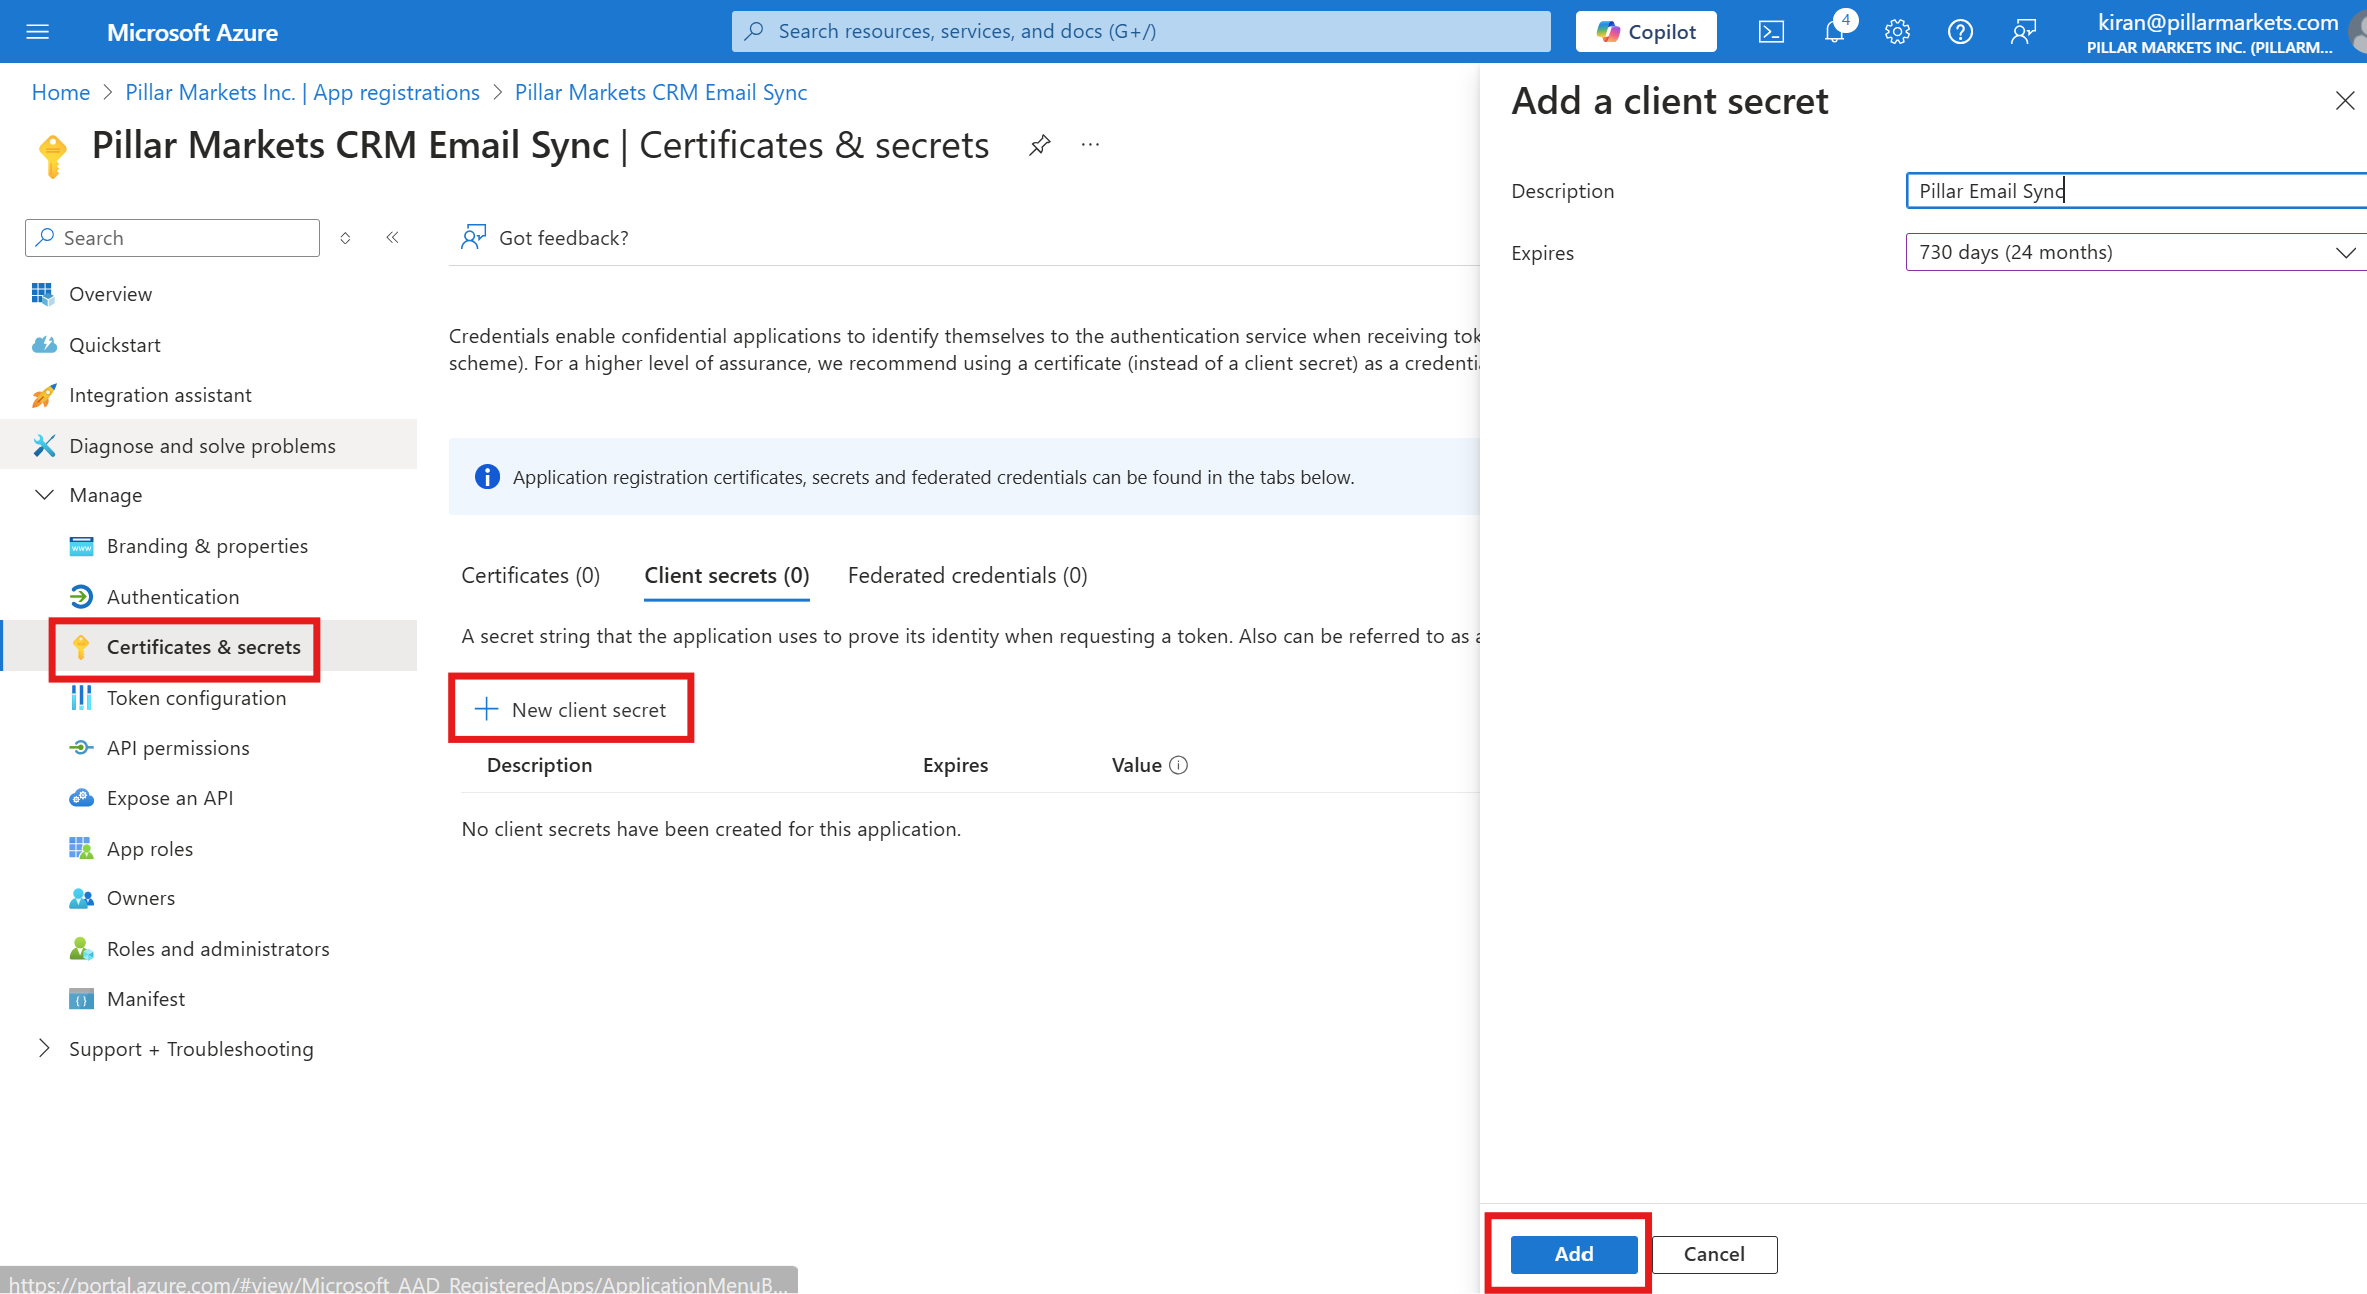
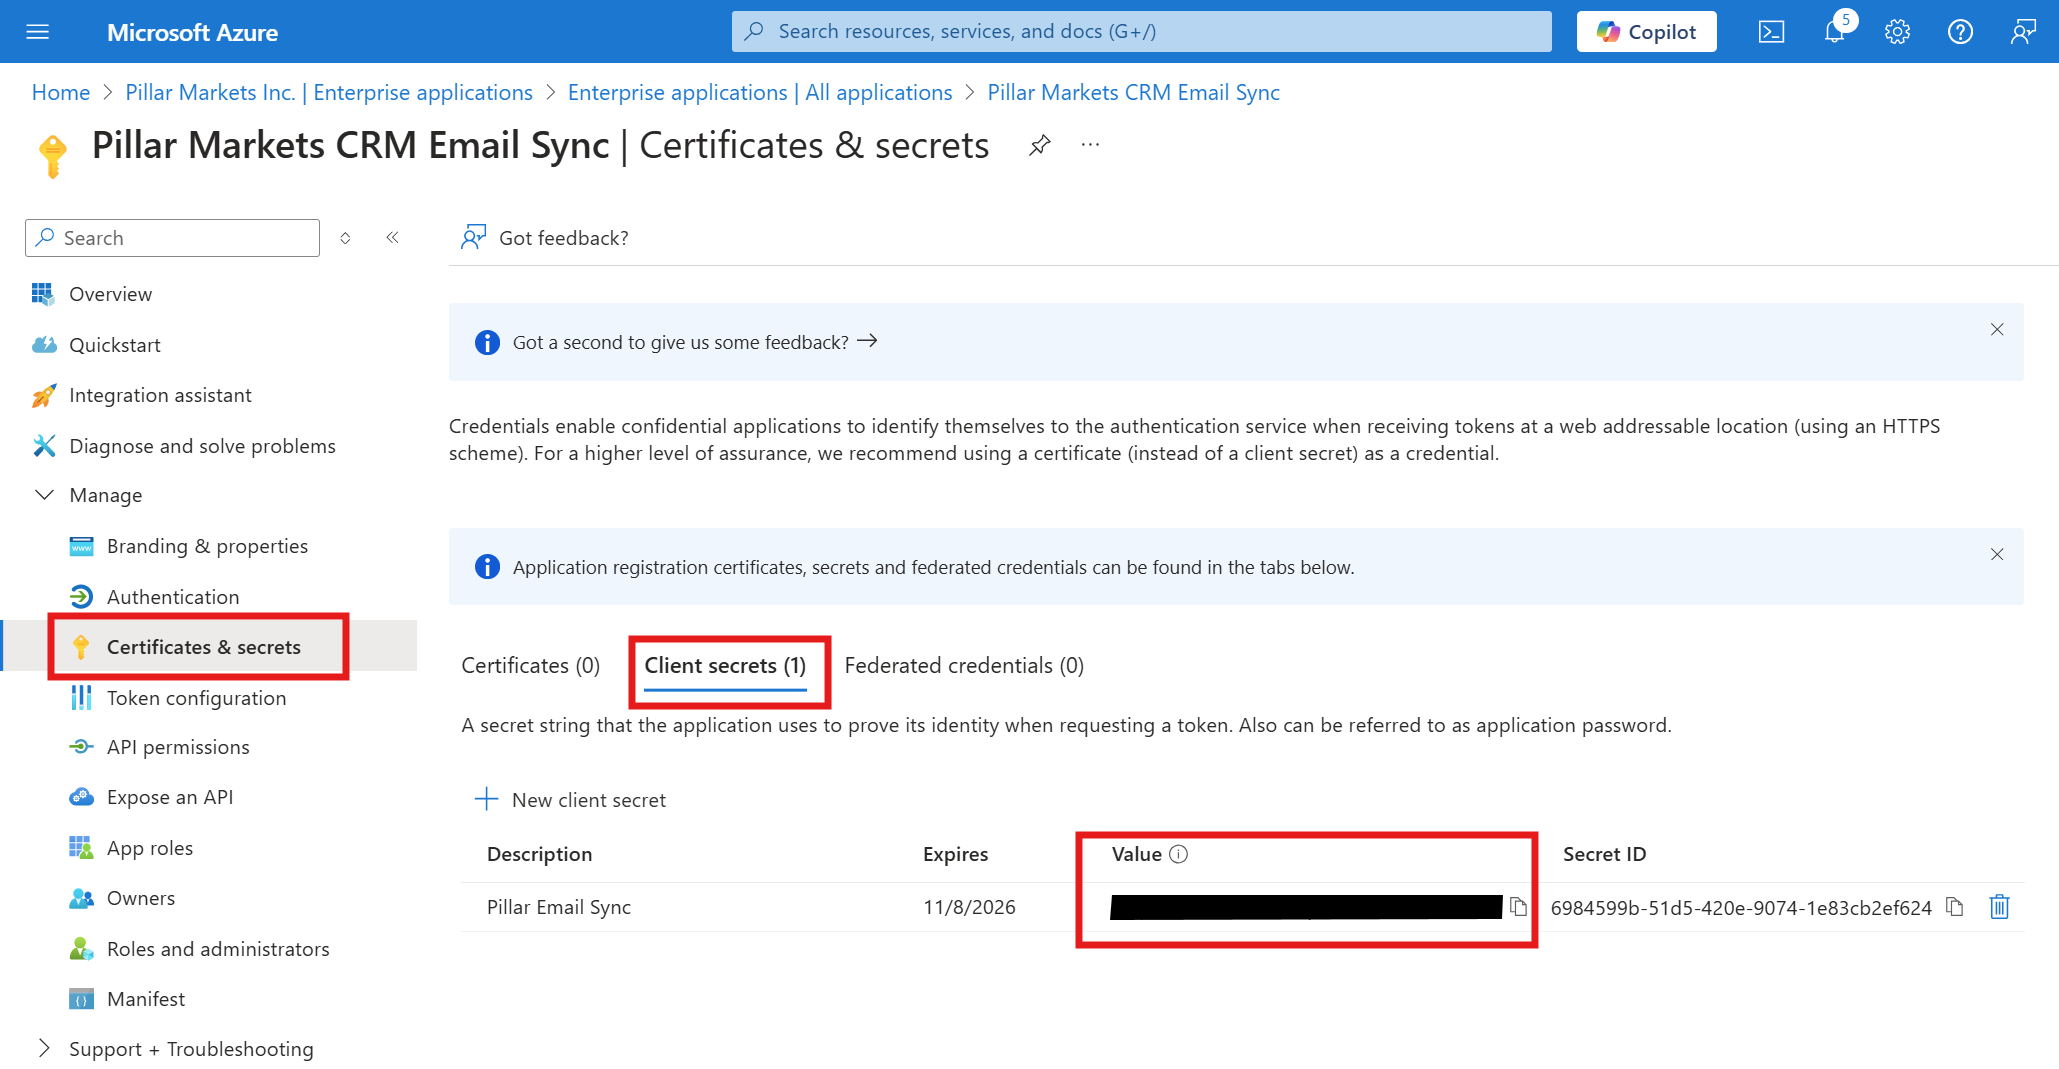
Generate a Client Secret:
The final step is to generate a client secret. Multiple client secrets can be created for an Enterprise Application, allowing you to rotate credentials or revoke access.
Navigate to Certificates & secrets and click New client secret. Give your client secret a description, set the expiration date, and click Add.
Share credentials with Pillar:
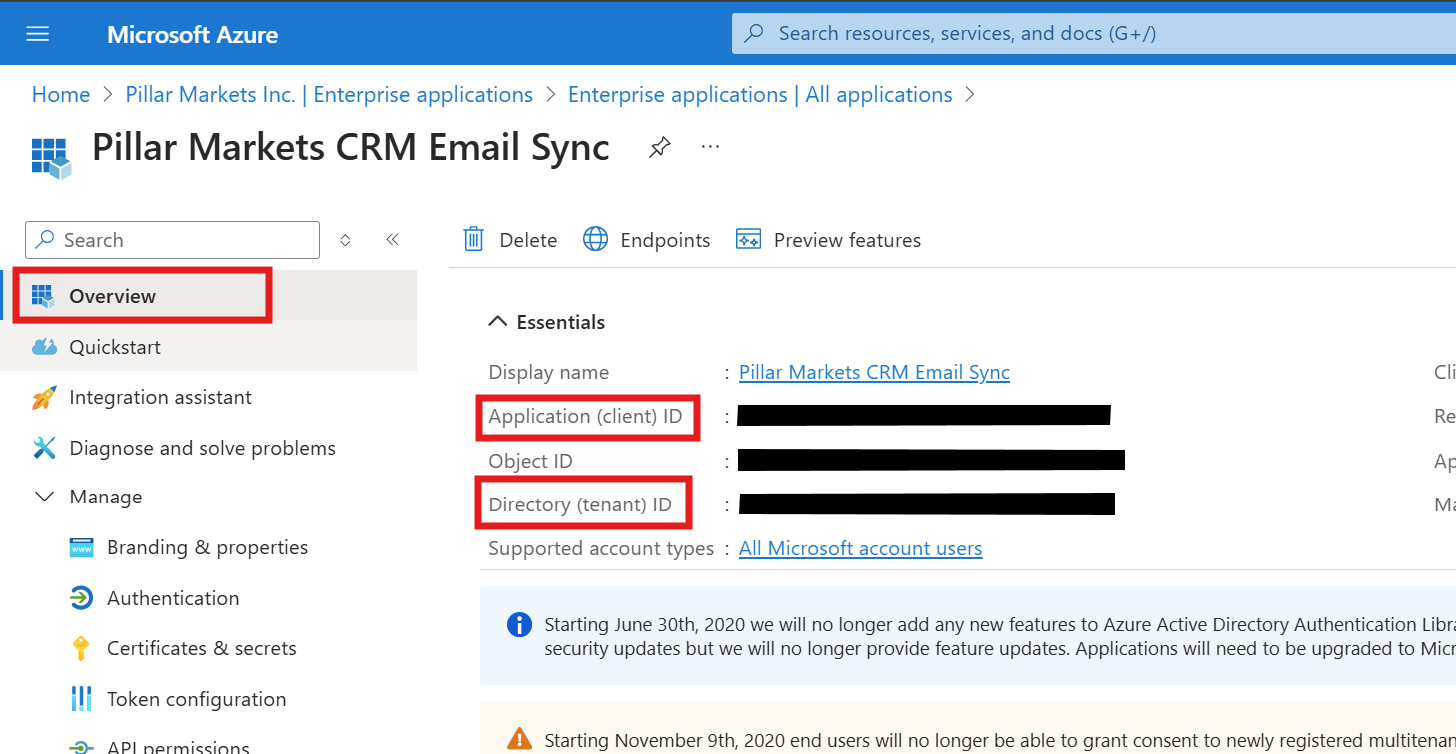
Navigate to Overview and share the following credentials with the Pillar team. If you need further assistance, reach out to support@pillarmarkets.com!
- Directory (tenant) ID
- Application (client) ID
- Client Secret
Hardening - Optional but highly recommended
Due to application permissions being used, the credentials generated for this application are able to read the emails and calendars of any user in your tenant and send emails as them.
Restrict access with a Mail-Enabled Security Group
To limit access, create a mail-enabled security group and restrict the app to only members of this group. This ensures only authorized users' mailboxes can be accessed by the application.
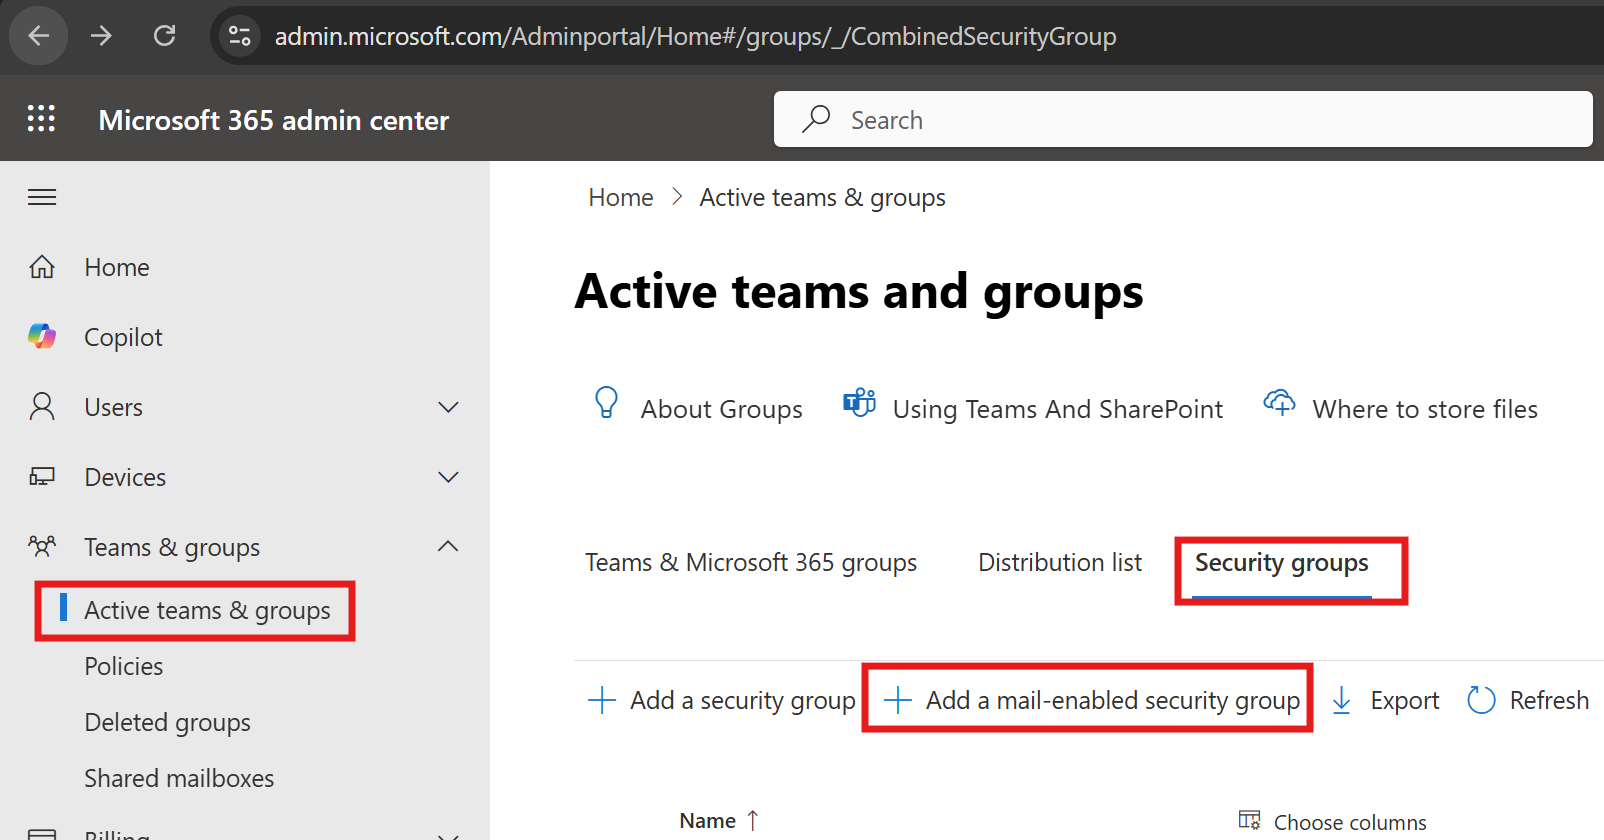
- Create a Mail-Enabled Security Group
- In the Microsoft 365 admin center, go to Teams & Groups > Active teams & groups > Add a group.
- Choose Mail-enabled security as the group type.
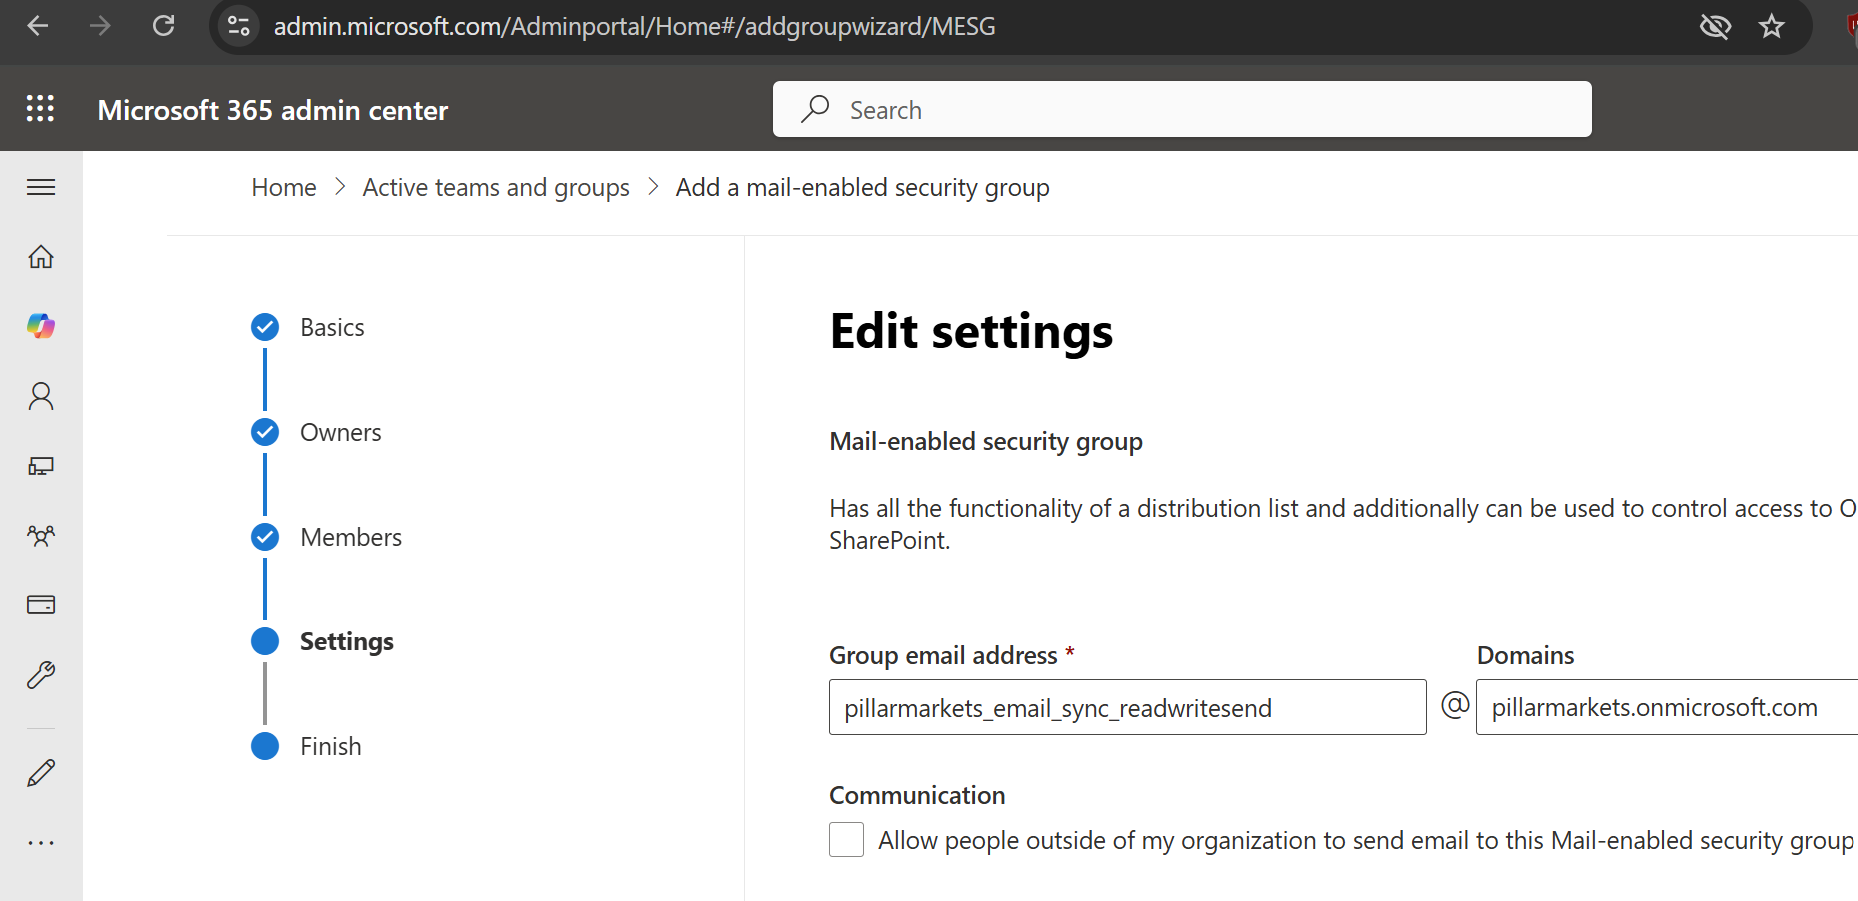
- Set the group email (e.g.,
pillarmarkets_email_sync_readwritesend@your_domain). - Add only the users who should be accessible by the app.
-
Apply the Application Access Policy
- Open PowerShell and connect to Exchange Online:
Connect-ExchangeOnline - Run the following command, replacing the parameters as needed:
New-ApplicationAccessPolicy -AppId <your-application-client-id> -PolicyScopeGroupId "pillarmarkets_email_sync_readwritesend@your_domain" -AccessRight RestrictAccess -Description "Restrict this app to members of mail enabled security group pillarmarkets_email_sync_readwritesend@your_domain" - Replace
<your-application-client-id>with the Application (client) ID you created earlier in this guide. - Replace
@your_domainwith your domain. - This restricts the app to only access mailboxes of users in the
pillarmarkets_email_sync_readwritesendgroup.
- Open PowerShell and connect to Exchange Online:
-
Test the Application Access Policy
- To verify the policy is working as expected, run the following command in PowerShell (replace the email and AppId as appropriate):
Test-ApplicationAccessPolicy -Identity <email_address@your_domain> -AppId <your-application-client-id> - Replace
<your-application-client-id>with the Application (client) ID you created earlier in this guide. - Replace the email with a user in your organization to confirm access is restricted as intended.
- To verify the policy is working as expected, run the following command in PowerShell (replace the email and AppId as appropriate):
For more details and official documentation, refer to: Limit application permissions to specific Exchange Online mailboxes